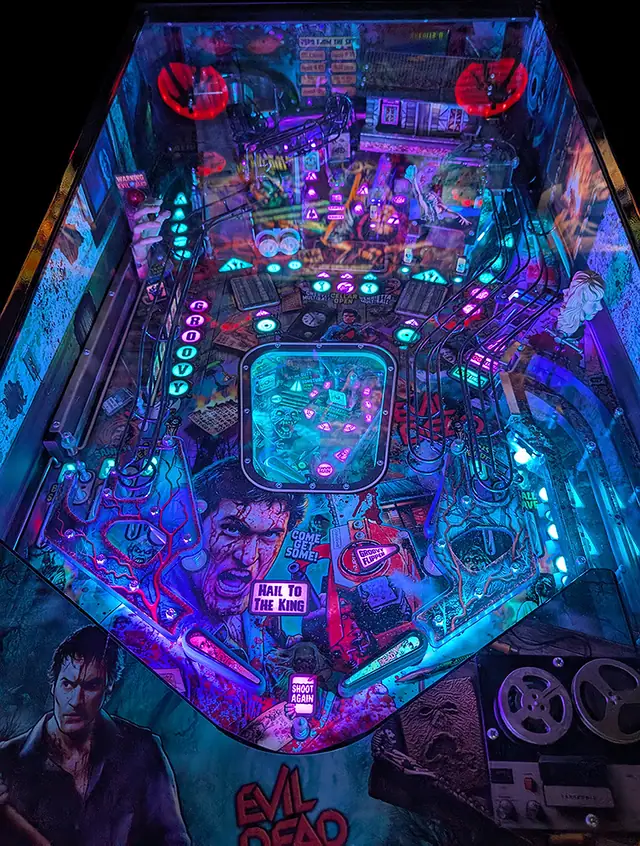
Silverball guide · Evil Dead
Bad Linda is the difficulty dial, and it pays
The scoop on the right rotates Linda between good and evil. Good Linda makes the modes easier and worth less. Bad Linda makes them harder and worth more. That is a choice the machine hands you, and most players never notice they are making it.
The choice before the choice
At the start of a game you pick which of the two films you are playing, and that decides which four modes are available to you. There is a mini wizard mode after two of them and a wizard mode after all four.
So the game is not a long grind through everything. It is four modes, chosen at the plunge, and each of those four is split into two phases: a setup phase that qualifies the mode, and a frenzy phase where the scoring actually lives.
Good Linda, Bad Linda
The scoop on the right rotates Linda between her good and evil versions. Good Linda relaxes the rules of your modes and lowers what they pay. Bad Linda tightens them and raises it.
This is the most interesting decision on the machine because it is reversible and it is entirely yours. Set her good while you are learning a mode or nursing a bad ball, set her evil when you have a mode qualified and a ball you trust.
Qualifying a mode, and refusing the one you are offered
Modes are lit by shooting the ramps when they are lit white, then started under the right ramp. The first costs one ramp and each subsequent one costs an extra ramp on top.
Two controls are worth knowing. The captive ball changes which mode will start when more than one is available. And the action button starts qualifying a different mode altogether, closing the right ramp and asking for more ramps to qualify the next one. You are not stuck with what came up.
Reaching the frenzy phase is what counts
In several modes the completion condition is simply reaching the frenzy phase, not surviving it. Evil Awakens wants four lit cellar targets and then the cellar within ten seconds. Hacked to Bits wants five hits on the GROOVY drops or the necklace targets.
Once you are in the frenzy, the mode is already banked and everything after that is profit. That changes how you should play the last shot of a setup phase: take the safe route, not the fast one.
The two that ask for more
It Won't Let Us Leave wants four randomly lit green shots to get you into the woods, and then repeats a cycle three more times: score scare jackpots at the red shots for twenty seconds, then hide in the cellar to bank what you built.
Undying Love is the best one. Combo the two ramps, with a speed bonus for how quickly you link them, then the cellar and the loop on the lower playfield to dig the grave, which starts a two ball multiball as Linda comes back. Red shots pay jackpots and the necklace targets raise their value.
Deadites stack with everything
Collect the orange deadite arrows, then both inlanes, then hit the popped-up deadites, and you get a double deadite multiball that stacks with every other mode in the game.
That last clause is the useful part. Get a mode running and then bring the deadites in on top. The second time through, it becomes a frenzy, which is even better inside a multiball.
The other film, briefly
The second movie's four modes run to three phases rather than two. Hello Lover has the spinner make Linda dance while other shots raise the value, then blue shots, then the cellar, then the deadites. Give Me Back My Hand wants three hits on the hand, then the trap door for a multiball, then jackpots with the super at the hand once FINGERS is complete.
Chased by Evil moves you through blue arrows, then green shots to hide, then white shots to run. Evil Ash turns red shots blue and then sends you to the necklace targets. Give Me Back My Hand is the one to bring into a multiball.
The two multiballs outside the modes
Cabin Multiball comes from knocking the drop target down and shooting the ball up into the lock mechanism, and its locks can be stolen from another player.
Blood Flood is three targets in the pop bumper area and adds a scoring multiplier to the playfield. Given that the bumpers are also where Linda plays her tricks on you, it is a trip worth making deliberately rather than by accident.
Boom stick
Open the cellar door to load shells into the shotgun. That sends you to the basement with fifteen seconds or three drains to hit the lock and load shot.
Then listen rather than look: the callout counts ready, aim, fire, and hitting the launch button on cue pays a bonus. Purple shots are the jackpots, loading more shells lights the action button for a fresh one, and the second phase lets you add balls.
The small print
Seven hits on the hand lights an extra ball, and two of those are spotted at the start of a game, so it is five in practice. Spelling GROOVY lights the mystery at the right orbit, where the action button shoots at a moving award.
And be warned that the pop bumpers are Linda's. Hits in there trigger her tricks, which include resetting GROOVY, reversing your flippers, lighting a fake ball save, and deliberately ruining your next mystery award. On this machine, the bumpers are not a safe place to leave the ball.
Where this came from
Silverball wrote this, but not from scratch: it was compiled against the published rules below and checked against them, rather than written up from one person’s games. None of the wording is theirs. Machines get code updates that move the right shot, so a guide has a date on it for a reason.
- Evil Dead rule sheet (author not recorded in our copy)