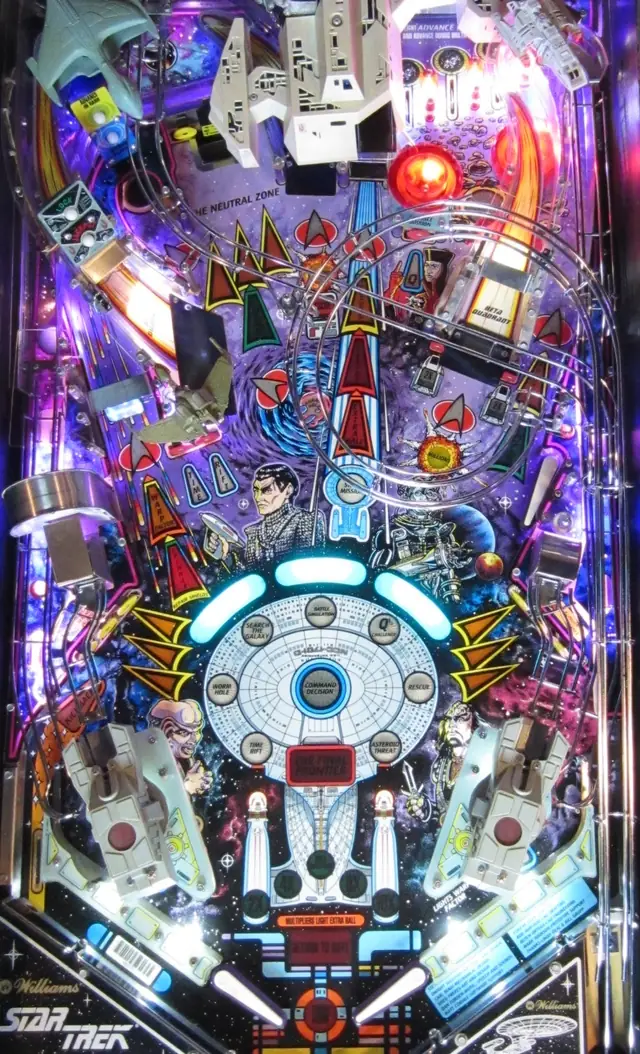
Silverball guide · Star Trek: The Next Generation
Collect artifacts, not points
Seven missions, a warp ladder and a six-ball finale. The scoring is almost entirely decided by four small objects you pick up along the way.
The finale is priced in artifacts
There are four artifacts — the Singing Stone, the Isolinear Chip, the Diranium Sphere and the Dilithium Crystal — and each is worth 50M on collection. That is not why you want them.
You want them because of Final Frontier, the six-ball wizard mode that follows the seven missions. Every shot is lit, and what each one pays is decided by how many artifacts you are carrying: 100M for each artifact up front, and 25M per artifact on every shot.
Then the real number. Every complete set of four artifacts awards a billion points. Two full sets, two billion. On newer ROMs you can hold up to ten sets.
With no artifacts at all, Final Frontier shots are worth ten million each and the whole thing is an anticlimax. So the game is not really about playing the missions — it is about what you extract from them on the way through.
Where the artifacts actually come from
Nearly every mission can yield one, and knowing which condition to hit changes how you play each.
Battle Simulation gives one for completing level five. Q's Challenge gives one for making five shots. Asteroid Threat gives one after three shots. Time Rift averages out around five shots. Rescue gives one for any combination of twenty-five people rescued or loaded into the shuttle. Worm Hole gives one for shooting the Delta quadrant. The ninth cavern of Shuttle Simulation holds one.
And Warp Factor 8 awards an artifact every time after the first — the first visit gives you an extra ball instead, unless extra balls are disabled, in which case it is always an artifact.
Read that list as a set of thresholds rather than a set of modes. You do not need to complete most of these missions; you need to reach the point in each one where the artifact drops.
Search the Galaxy pays for doing it in order
This is the mission with the most on offer, and the ordering is the whole thing.
You are asked for the Alpha quadrant first — the centre ramp, for 10M. Then Beta, the right ramp, for 20M. Then Delta, the left ramp, for 30M. Hit all three ramps in any order and you get an artifact.
But do them in the order you are asked, and you are then sent to the Gamma quadrant at the Neutral Zone target for 50M — and that hands you a second artifact.
Two artifacts from one mission is the best rate in the game, and the only cost is shooting three ramps in a specified sequence rather than whichever is convenient.
The warp ladder is a second game
Every ball starts at Warp 1. The right inlane lights the spinner to increase warp, and the left ramp always advances it until you have been to Warp 9. One caveat that catches people: warp only advances if the ball goes right around the left orbit past the bumpers. Dribbling into the multiplier lanes does not count.
The rewards climb sensibly. Factor 2 pays 5M. Factor 3 sets the jets at a million a pop for the rest of the ball. Factor 4 lights the spinner, 5 holds your multipliers, 6 lights the return lanes, 7 doubles the spinner. Factor 8 is your extra ball, and every visit after that is an artifact.
Factor 9 starts Factor Nine mode, where each shot to the spinner or left ramp adds a tenth. The first is worth 20M and they climb by 5M a step to 60M at warp 9.9.
The one timer that never stops
Factor Nine mode has a trap in it that no other mode on this machine has, and it will cost you the whole mode if you do not know about it.
Every other timer here behaves normally. This one does not stop for anything.
So during Factor Nine, do not lock a ball and do not shoot a sinkhole. The seconds you spend watching a ball sit in a hole are seconds off a ten-second window, and you will simply run out mid-ladder. Keep the ball live and keep shooting the spinner and the left ramp.
The last step is more generous — twenty seconds rather than ten for warp 9.9 — but that is the only mercy in it.
Battle Simulation rewards patience
This is the other mission with an unusual timer, and here it works in your favour: the clock stops while the guns are loaded.
Shoot any hole to load a launcher, then pull the trigger to fire into Start Mission or the Neutral Zone. Each successful shot advances a level, and each level is worth ten million times its number, so level three pays 30M. Level six is the last and pays 100M, often with an extra ball.
Because the timer pauses with a gun loaded, a run of good shots buys you a long cushion to recover from a miss. And there is a shortcut on the right cannon: firing into the Neutral Zone only needs to hit one of the targets, not go into the hole — though putting it in the hole is better, since it loads the left launcher for you.
Level five is where your artifact is, so a mission that stalls at four has given you nothing.
The plunge is a menu
Before you launch, the display cycles through five choices and you launch on the one you want. The flipper buttons speed the cycle up, so this is a real decision rather than a lottery.
Start Mission launches straight into the flashing mission. Flipper Skill Shot puts the ball in the sinkhole and names a prize for the right ramp — extra ball, special, hold multipliers, advance rank and more. Launch Probe lights a shot for a similar award. Light Lock locks the ball, though only twice per multiball before it becomes Light Holodeck. Warp Factor 4 simply starts you four rungs up the ladder.
Warp Factor 4 is the quiet one worth taking often, since it puts you within reach of Factor 8 and its artifact without spending most of a ball climbing there.
Where this came from
Silverball wrote this, but not from scratch: it was compiled against the published rules below and checked against them, rather than written up from one person’s games. None of the wording is theirs. Machines get code updates that move the right shot, so a guide has a date on it for a reason.
- Star Trek: The Next Generation rule sheet (author not recorded in our copy)