Silverball guide · Deadpool
Never start a battle empty-handed
Deadpool will happily let you walk into a fight with nothing prepared, and it will let you win it too. The difference between that and a good game is four shots you take before the battle starts.
Team-Ups are the whole difference
During ordinary single-ball play, with no major mode running, shoot any shot carrying a Team-Up icon twice and that character is armed for your next battle. There are four, and they are not interchangeable.
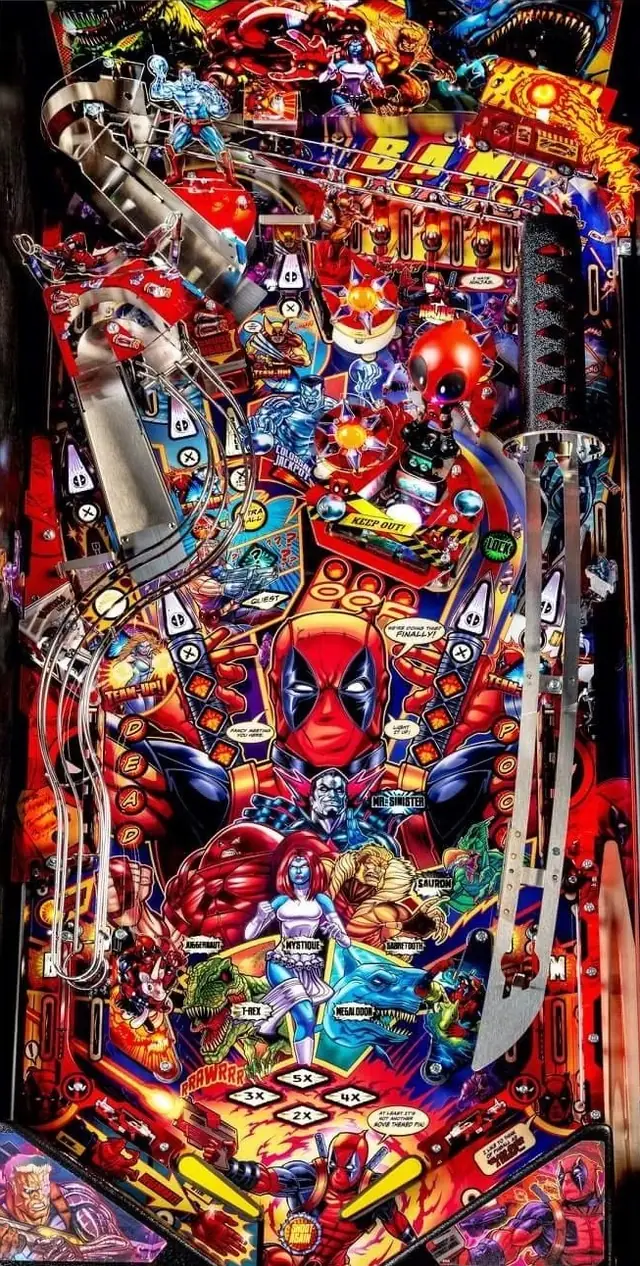
Colossus, at the U-turn, doubles all points scored during the battle. Wolverine, at the centre spinner, doubles all damage you deal. Dazzler, at the left orbit, lengthens Deadpool's health bar and adds time. Domino, at the right orbit, boosts one feature per opponent: the targets against Juggernaut, the spinner against Mystique, the bumpers against Sabretooth.
Once you have used a Team-Up in a game, requalifying it costs one more shot than before, so the cheap ones are the early ones. The habit worth building is simple: never take the scoop with a battle lit until you have at least one of these armed, and preferably Colossus and Wolverine together.
Mystique deserves a specific mention. She transforms into a partner during her battle, and shooting the matching Team-Up shot at that moment deals serious damage.
The Final Shot, and the only way to lose credit for a win
Beat an opponent and the scoop lights for ten seconds to finish them off. That Final Shot is scored on how much health Deadpool has left and how quickly you won, and a near-full health bar is worth around thirty million.
Losing a battle is not a disaster. Progress saves, and you come back to it with a fresh health bar. What does not save is the Final Shot value, so a battle scraped through on a sliver of health has cost you most of what it was worth even though the win counts.
One asymmetry to know. Drain with the Final Shot lit and you still get credit for the win. Tilt with it lit and you do not.
Three battles, then the same three again
Juggernaut is taunted by hitting any four of the DEAD or POOL targets, which stops him attacking and lights every main shot for damage for twenty seconds before you have to do it again. Mystique wants the centre spinner, then both ramps, after which all three stay lit. Sabretooth takes damage from either orbit or the centre spinner, and every orbit during his battle feeds the top lanes and bumpers for more.
Win all three and Sauron lights at the scoop for a three-ball multiball. Then the three battles come round again, this time with Sauron surfacing to block your kill until you damage him with both ramps. Winning that second lap lights Clone Multiball.
Deadpool takes damage on a timer if you are not making lit shots, so cradling up to think is expensive here in a way it is not on most machines.
Weapons are the quiet engine
Shoot white shots and then the scoop to cash out weapons, and how many you get depends on how many white shots you made first. It is the most ordinary-looking loop on the machine and it pays for three separate things.
Twenty-five weapons lights an extra ball. Forty-five lights Mechsuit Multiball. And every hundred weapons adds a permanent 1x to your playfield multiplier for the rest of the game, which is the reason to keep cashing out long after you have the multiball.
They also add 100,000 each to the end-of-ball bonus, alongside 250,000 per chimichanga and 100,000 per ninja star. The bonus is held between balls, though the multiplier is not.
Playfield multiplier: two kinds, and one times out
The base multiplier starts at 1x and rises permanently: completing Lil' Deadpool Bounce adds 1x for the rest of the ball, and every hundred weapons adds 1x for the rest of the game.
On top of that sits a temporary boost, earned by rebounding the ball off the SNIKT standup onto the right katana ramp. Any further shot to SNIKT adds a few seconds. The catch is that the higher the temporary multiplier climbs, the faster it decays, and once you are at 5x the combo stops raising it and only extends the timer.
So the multiplier is not something to bank. Get it up and immediately go and spend it on a Colossal Jackpot, a super jackpot or a battle you have already armed.
The BOOM button, and the version worth waiting for
Spell BOOM at the return lanes, which cycle with the flippers, and the action button lights. Pressing it spots the highest-value lit shot on the playfield, excluding the scoop. If nothing is lit or everything is worth the same, it favours the left side.
Complete BOOM four times without spending it and the button lights red for Big Boom, which collects every lit shot at once. A normal use is still available at that point by holding the button rather than pressing it, so waiting costs you nothing.
The obvious place to spend it is the opening wave of jackpots in Sauron Multiball. During Berserker Rage it does more: a normal press adds the highest spin session value from that mode on top, and a Big Boom pays four times that value as well as clearing the playfield.
Quests, and the jackpot that scales with the mess you make
The right orbit advances the chimichanga truck and lights chimichangas at the major shots. Collect three of them, one more for each quest you have played and capped at eight, and Quest lights at the scoop. If a Battle is lit at the same time you can take that instead, so the scoop is a choice rather than a queue.
The T-Rex quest wants five bombs: green shots to drop the Lil' Deadpool targets, then the hurry-up at the standup, with extra green shots beforehand raising it. The Megalodon quest hides one strobing red shot that moves between the lit blue ones, and you have to hit it five times.
What makes both worth playing properly is the Mode Jackpot at the end, which is a percentage of everything you scored during the quest. A quest played expensively is worth more than a quest played quickly, which is the opposite of how the battles work. Progress saves if you fail, and draining with the final shot lit still credits the quest but loses the jackpot.
The multiballs, and what each one costs
Ninja Multiball locks three balls at the right katana ramp, and the locks are lit by default at the start of every game. Its jackpots are set by how many ninja stars you have collected from the bumper-lit blue shots, and it stacks into Battles and Quests, which makes it the one to hold back for a mode.
Disco Multiball needs sixty spins on the left spinner, then sixty more each time after, and it can only start when nothing else is running. Mechsuit Multiball needs forty-five weapons and comes round again at 150, 250 and 350.
The Lil' Deadpool modes always arrive in the same order: Multiball, then Frenzy, then Bounce. They can be started during normal play or during a Battle, but not during a Quest or any multiball, so the Bounce that gives you a permanent playfield multiplier has to be taken in a gap.
The Ninjapocalypse combo, right orbit into right ramp, is worth learning as a single habit: it hands over ten ninja stars at once along with five million plus half a million per combo.
Where the cabinets differ
Our source names exactly one rules difference between the Pro and the Premium and LE, which is unusually few for a modern Stern. On a Premium or LE, the sixty-spin threshold at 60, 180, 300 and so on starts Disco Loops instead of Disco Multiball: a timed single-ball mode whose only object is to loop the left orbit ramp as many times as you can.
Everything else in this guide is written to hold on any cabinet. If your Premium does something here differently, our source did not record it.
Where this came from
Silverball wrote this, but not from scratch: it was compiled against the published rules below and checked against them, rather than written up from one person’s games. None of the wording is theirs. Machines get code updates that move the right shot, so a guide has a date on it for a reason.
- Deadpool community rule sheet (author not recorded in our copy)